<Do not delete this text because it is a placeholder for the generated list of "main" topics when run in a browser>
This tutorial covers the use of Oracle Data Miner to perform text mining against Oracle Database 11g Release 2.
Much of today's enterprise information includes both structured and
unstructured content related to a given item of interest. For example:
- Customer account data may include text fields that describe support calls and other interactions with the customer.
- Insurance claim data may include a claim status description, supporting documents, email correspondence, and other information.
- Patient data may include comments by doctors and nurses.
It is often essential that analytic applications evaluate the structured information together with the related text.
In this tutorial, you use Oracle Data Miner to include customer
comments collected during a survey to better identify good customers.
Approximately 30 mins.
Data mining is the process of extracting useful information from
masses of data by extracting patterns and trends from the data. Data
Mining allows you to mine data sets that contain regular relational
information (numeric and character columns), as well as one or more text
columns.
Oracle Data Miner uses the facilities of Oracle Text to preprocess text columns.
Transforming Text
Text must undergo a transformation process before it can be mined.
The text transformation extracts meaning from the text. Once the data
has been properly transformed, it can be used for building, testing, or
scoring data mining models.
Data Miner provides Text nodes that enable transformation of text
data. The resulting transformed data can then be used as input to build
and apply models.
Building Models
To build models that use text columns, you follow these steps:
- Create a workflow in an existing project.
- Create a data source node using data than has one or more columns of text data.
- Prepare the text columns for mining.
- Create training models against test data.
- Apply selected models against new data.
Note: Most Oracle Data Mining algorithms support text. However, O-Cluster and Decision Tree models don't support text.
Before starting this tutorial, you should:
1. |
Have access to or have Installed Oracle Database 11g Enterprise Edition, Release 2 (11.2.0.1) with Data Mining Option.
In addition, you must install the Oracle Database Sample Schemas, including the Sales History (SH) schema.
|
2. |
Have access to or have installed Oracle SQL Developer, version 3.0, or later.
Note: SQL Developer does not have an installer. To install
SQL Developer, just unzip the free SQL Developer download to any
directory on your PC.
|
3. |
|
In the Setting Up Oracle Data Miner 11g Release 2
tutorial, you learned how to create a database connection to a Data
Miner user and install the Oracle Data Miner Repository, all from within
SQL Developer.
In the Using Oracle Data Miner 11g Release 2 tutorial, you learned how to create Data Miner Project and Workflow.
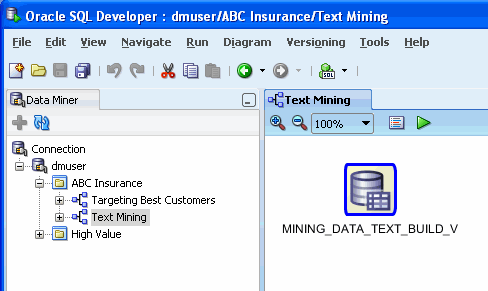
Here, you will create a new Data Miner project using the existing Data Miner user connection.
To create the new workflow, and then perform the following steps:
1. |
First, select the Data Miner tab.
Result: the dmuser connection that you created previously appears.
Note: If you have not yet created the dmuser connection, follow the instructions in Setting Up Oracle Data Miner 11g Release 2 to create the connection.
|
2. |
A. Drill on the dmuser connection and right-click the ABC Insurance project to display the pop-up menu:
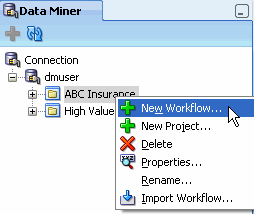
B. Select New Workflow from the menu.
Result: The Create Workflow window appears.
Note: If you have not yet created the ABC Insurance project, follow the instructions in Using Oracle Data Miner 11g Release 2 to create the project.
|
3. |
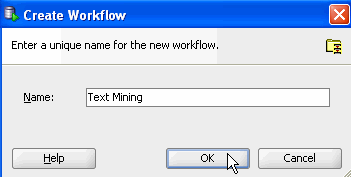
In the Create Worflow window, enter Text Mining as the name and click OK.
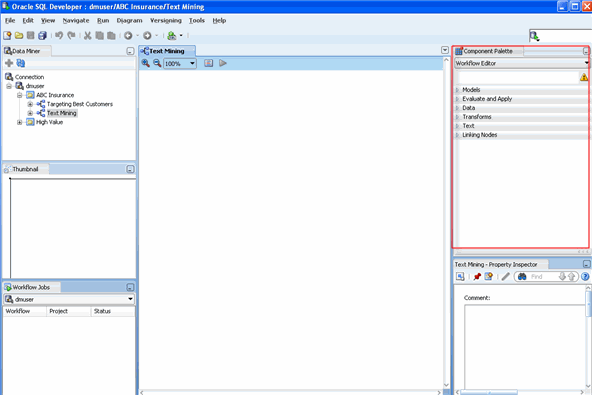
Result:
- In the middle of the SQL Developer window, an empty workflow canvas opens with the worflow name that you specified.
- On the right-hand side of the interface, the Component
Palette tab of the Workflow Editor appears (shown below with a red
border).
- In addition, two other Oracle Data Miner interface elements appear:
- The Thumbnail tab
- The Property Inspector tab
Note: The Targeting Best Customers workflow may be created by completing the Using Oracle Data Miner 11g Release 2 tutorial.
|
In this topic, you will perform the following tasks:
- Create a Data Source that contains text
- Transform the text column to prepare it for data mining use
- Build Classification models with the text
- Examine model results
- Apply models to new data
You first learned how to create data sources in the Using Oracle Data Miner 11g Release 2 tutorial.
In this topic, you create a data source in a similar fashion.
However, in this scenario the data column of intrest does not contain
regular relational information, but rather text descriptive information.
Note: Although in this example only one text column is used, input data can have several text columns.
To the appropriate data source, perform the following steps.
1. |
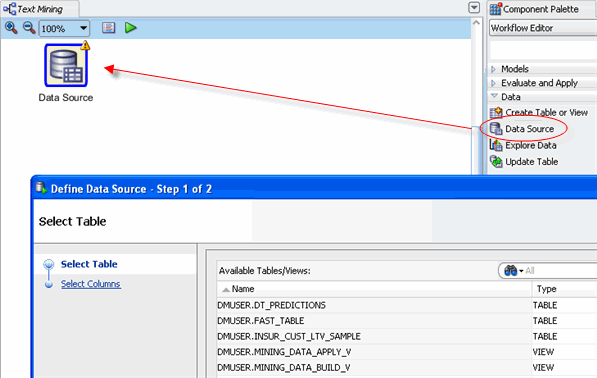
First, add a Data Source node to the workflow.
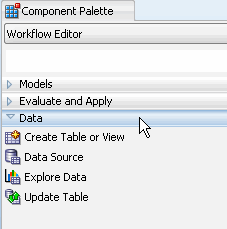
A. In the Workflow Editor of the Component Palette, click the Data category. A list of data nodes appear, as shown here:
B. Drag and drop the Data Source node onto the Workflow pane.
Result: A Data Source node appears in the Workflow pane and the Define Data Source wizard opens.
Notes:
- Workspace node names and model names are generated
automatically by Oracle Data Miner. In this example, the name "Data
Source" is generated. You may not get exactly the same node and model
names as shown in this lesson.
- You can change the name of any workspace node or model using the Property Inspector.
- The tables and views associated with the DMUSER account are displayed in the wizard by default.
|
2
. |
In Step 1 of the wizard, scroll down in the Available Tables/Views list and select the MINING_DATA_TEXT_BUILD_V View, like this:
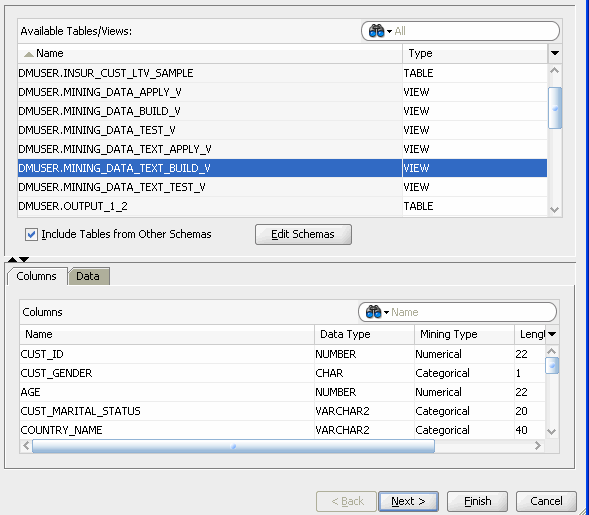
Note: You may use the two tabs in the bottom pane in the wizard to view and examine the selected table.
- The Columns tab displays information about the table structure.
- The Data tab shows a subset of data from the selected table or view.
|
3
. |
In Step 2 of the wizard, you may remove individual columns
that you don't need in your data source. For the time being, we'll keep
all of the attributes that are defined in the table.
Therefore, click Finish at the bottom of the wizard window.
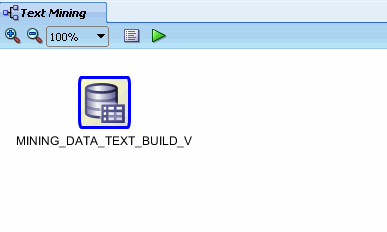
Result: As shown below, the data source node name is updated
with the selected view name, and the properties associated with the node
are displayed in the Property Inspector.
Notes:
- You can resize nodes in the workflow canvas by entering or selecting a different value from the Zoom options. Notice that 100% is selected by default in the Zoom pull-down list.
- You can add descriptive information about any node by using the Details tab in the Property Inspector.
- The Thumbnail tab also provides a smaller display of the
larger workflow window. As you drag nodes around the workflow window,
the thumbnail view automatically adjusts.
|
4
. |
MINING_DATA_TEXT_BUILD_V contains the column COMMENTS, which contains customer comments. To view some of the comments:
A. Right-click the data source node and select View Data.
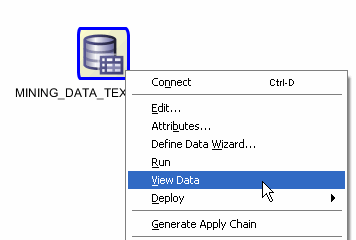
Result: The actual data is displayed in a new tab MINING_DATA_TEXT_BUILD_V.
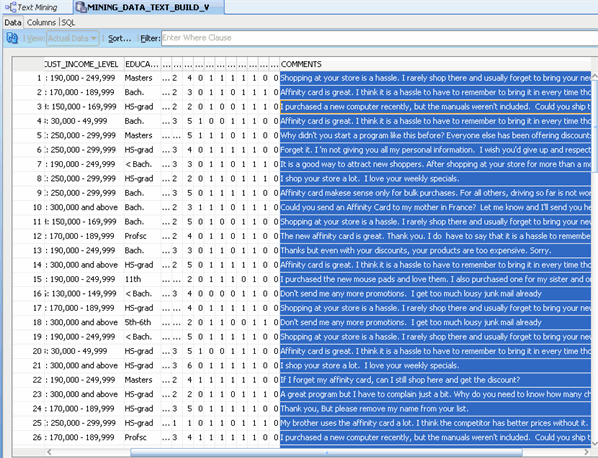
Note: You can resize any of the column headers to increase or reduce the data display, as shown above.
B. When you are done viewing the data, close the tab by clicking the (X) icon.

|
5
. |
Click the Save All tool in the SQL Developer toolbar.
Result: The workflow document is saved, and the workflow name changes in appearance from itatic to a normal font display.
|
Since the COMMENTS attribute consists of unstructured data, it
must be prepared before it is used for model building and mining.
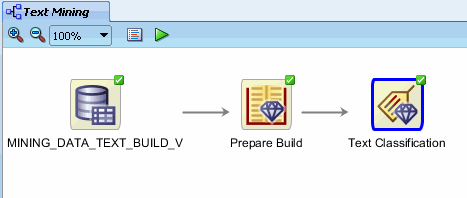
To transform the text column, you will:
- Add a Build Text node
- Connect the data source node to the build text node
- Specify transformation rules in the build text node for the COMMENTS attribute
- Run the transformation process
Follow these steps:
1
. |
First, create a Build Text node.
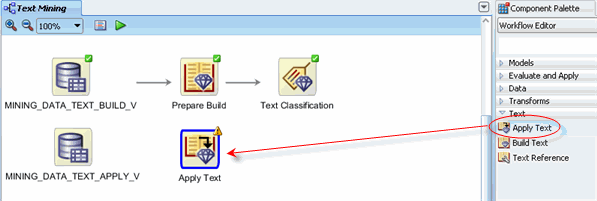
A. In the Component Palette, click the Text category. A list of text nodes appear, as shown here:
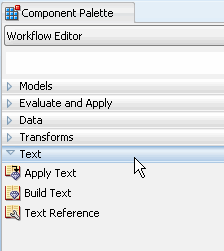
B. Drag and drop the Build Text node onto the Workflow pane, as shown here.
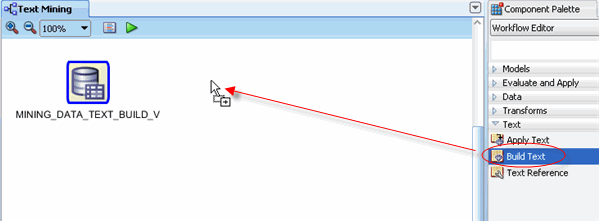
Result: a Build Text node appears in the workflow canvas, like this:

Notes:
- A yellow Information (!) icon in the border around any
node indicates that it is not complete. Therefore, at least one
additional step is required before the aggregate node can be used.
- In this case, the build text node must be connected to the data source node.
|
2
. |
Second, link the data source node to the build text node by using the following instructions:
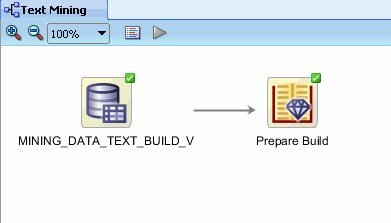
A. Right-click the MINING_DATA_TEXT_BUILD_V node and select Connect from the pop-up menu. Then, then drag the pointer to the Build Text node, as shown here:
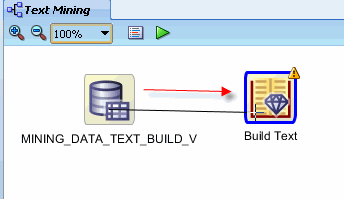
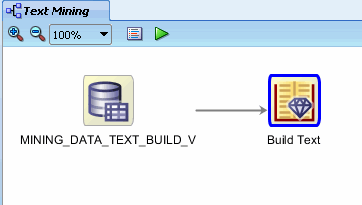
B. Finally, click the Build Text node to connect the two nodes. The resulting display looks like this:
|
3
. |
Although this next task is optional, it is helpful to rename nodes to describe the function that they represent.
A. Using the Property Inspector, change the node name to Prepare Build, like this:
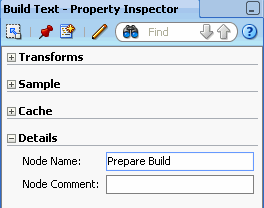
B. Click anywhere in the workflow pane to update the node name.
The display should now look like this:
|
4
. |
Third, specify the transformation rules for the text column.
A. Right-click the Prepare Build node and select Edit from the menu.
Result: the Build Text Details window opens:
B. In the Build Text Details window, select the COMMENTS column and then click the "+" icon, like this:

Result: The Add/Edit Text Transform dialog opens, as shown here:

Notes:
- The Transform Type values include Token and Theme
- Settings options depend on the type you choose
- Default values for each setting may be modified
C. Accept all of the default settings for the "Token" type, and click OK return to Build Text Details window.
Result:
- The Output column for the COMMENTS attribute displays a
new icon. This icon indicates that the attribute will not be passed on
to subsequent nodes such as a model build node.
- A new Transform attribute is created, named
COMMENTS_TOK. This new attribute will be passed on in place of the
COMMENTS attribute.
D. Click OK in the Build Text Details window to save the transform rules.
The workflow should now look like this:
|
5
. |
Finally, right-click on Prepare Build and select Run to execute the transformation.
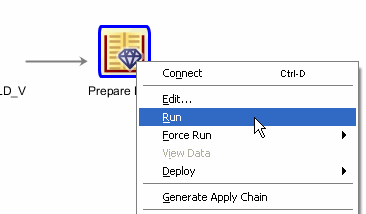
Result: The build text node creates the new attribute COMMENTS_TOK, which consists of tokens.
After the process is done, the workflow display looks like this:
|
6
. |
To view the tokens:
A. Double-click Prepare Build and select COMMENTS_TOK in the upper pane.

Notes:
- COMMENTS_TOK has type DM_NESTED_NUMERICALS.
- The lower pane has two tabs: Tokens and Output.
- As shown above, the Tokens tab lists each token value and their frequency found in the customer comments.
B. Click the Output tab.
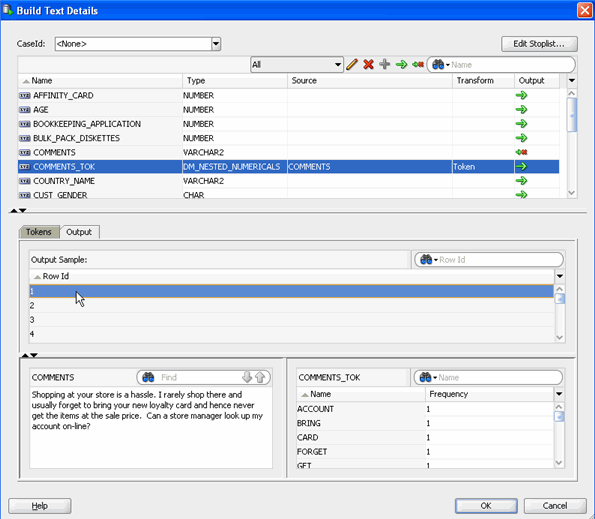
Notes:
- The Output tab shows the tokens found in an an individual comment. Simply select a comment by number to see the tokens.
- Results for the first Row Id are shown in the example above.
C. When you are done viewing the Token and Output results, click OK to close the Build Text Details window.
|
|
At this stage in the process, the text column is prepared so that you
can use the data source to build models. The transformed attribute --
COMMENTS_TOK -- will be passed to the model build node, and COMMENTS
will not be passed on.
In this topic, you build Classification models that use the
transformed customer comments data to better identify good customers.
Then, you run the models.
1
. |
To begin, add a classification node to the workflow.
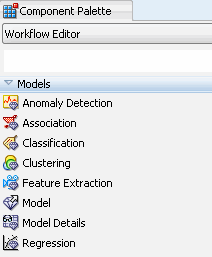
A. First, click on Models in the Component Palette to display the available list:
B. Then, drag the Classification node from the paleltte to the Workflow pane, like this:
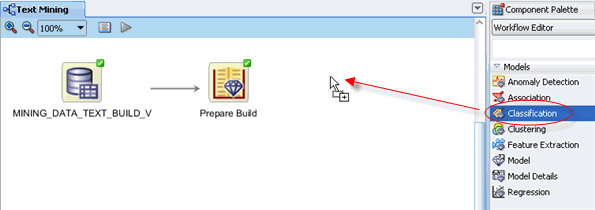
C. Drop the node onto the workflow. After a moment, a "Class Build" node appears in the workflow.
D. Using the Details section of the Property Inspector, rename the class build node to Text Classification. The workflow should now look like this:
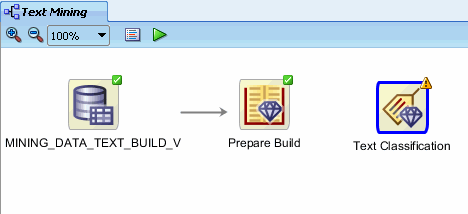
Notes: As stated previously, a yellow exclamation mark on the
border indicates that more information needs to be specified before the
node is complete. In this case, two actions are required:
- A link must be created between the Prepare Build node
(build text node) and the Text Classification node (classification build
node).
- One or more attributes must be specified for the classification build process.
|
2
. |
Next, connect the Prepare Build node to the Text Classification node using the same technique described previously.
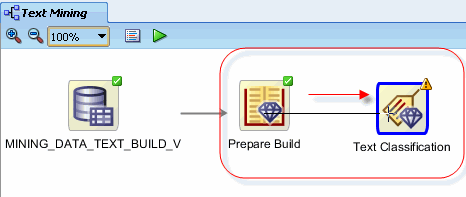
Result: the Edit Classification window appears.

Note: Notice that a yellow "!" indicator is displayed next to
the Target field. This means that an attribute must be selected for this
item.
|
3
. |
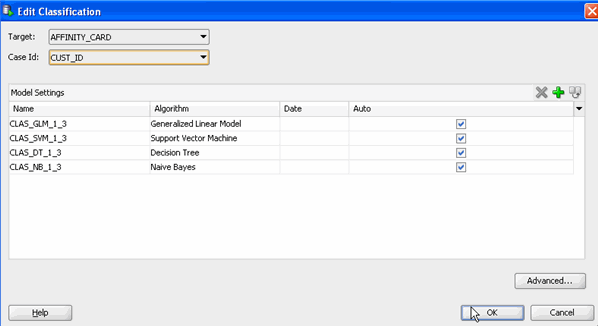
In the Edit Classification window, select AFFINITY_CARD as the Target attribute and CUST_ID as the Case Id attribute. Then, click OK.
.
|
4
. |
Right-click the Text Classification node and select Run from the pop-up menu.
Note: As before, green gear icons appear on the node borders
to indicate a server process is running, and the Workflow Jobs tab
shows the status of the build.
When the build is complete, the status column displays a green check mark.
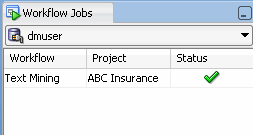
In the workflow pane, the border of the build node changes from a green gear turning to a green check mark, like this:
|
5
. |
You can view the status of the classification models by viewing the Models tab in the Property Inspector:
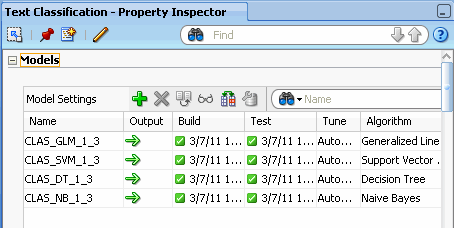
Notes:
- All four models have been succesfully built.
- The models all have the same target (AFFINITY_CARD) but use different algorithms.
- The source data is automatically divided into test data and build data.
|
Once the build process is complete, you can examine the models that
were built and see how the text features appear by viewing the models.
In this topic, you view some of the test model (also known as training model) results.
Follow these steps:
1
. |
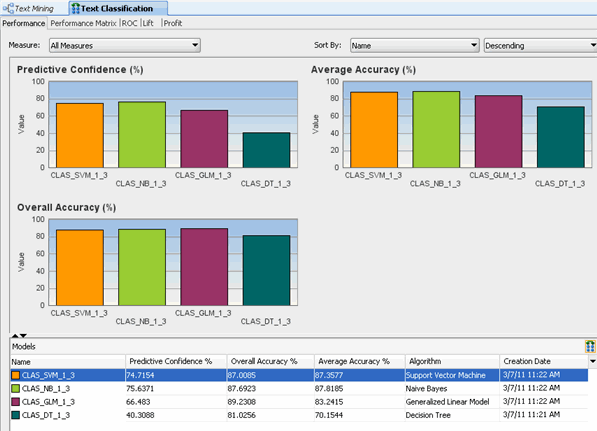
To compare all of the models:
A. Right-click the Text Classification node and select Compare Test Results from the menu.
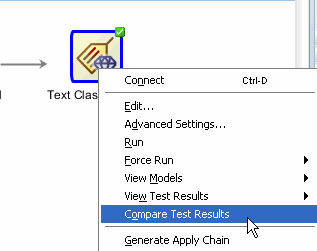
Results:
- A display tab opens (using the name of the node: Text
Classification), showing a graphical comparison of the four models, as
shown below.
- The Compare Test Results output includes five tabs: Performance (shown by default), Performance matrix, ROC, Lift, and Profit.
B. Select the Lift tab.
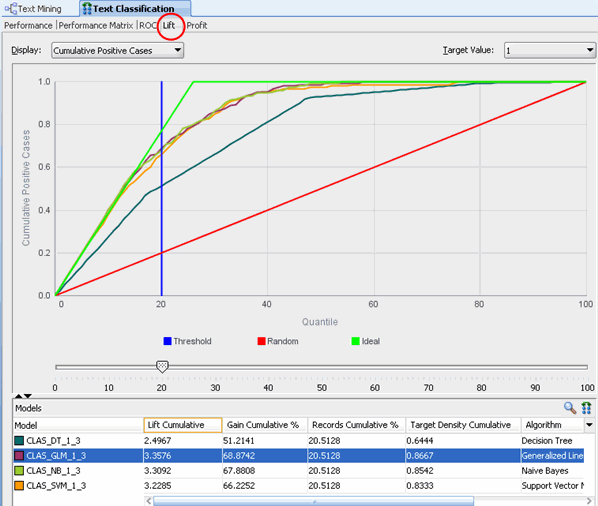
Notes:
- The Naive Bayes (NB) , GLM, and SVM models can include unstructured data e.g. "text" or customer comments
- As mentioned previously, the Decision Tree model does not
mine text, and therefore the other three models generate better "lifts"
over the Decision Tree model.
C. Feel free to examine any of the comparison results tabs. When you are done, Close the Text Classification display tab, like this:
|
2
. |
Next, examine individual models.
A. For example, right-click the Text Classification node and select View Models > CLAS_GLM from the menu.
Result: The Details tab for the GLM model is displayed by default.
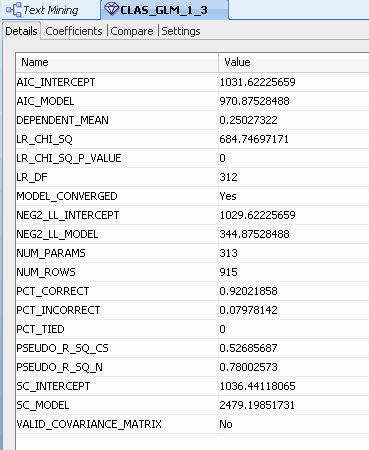
B. Select the Coefficients tab to show coefficients for the tokens in the COMMENTS_TOK attribute.
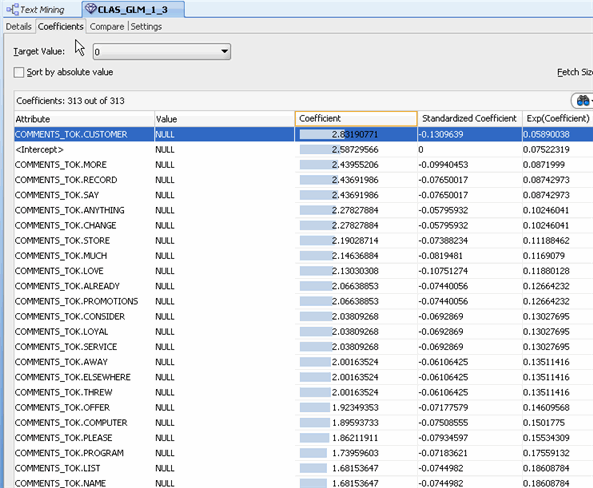
C. Close the the CLAS_GLM display tab.
D. To view the Coefficient data for the SVM model, right-click the Text Classification node and select View Models > CLAS_SVM from the menu.
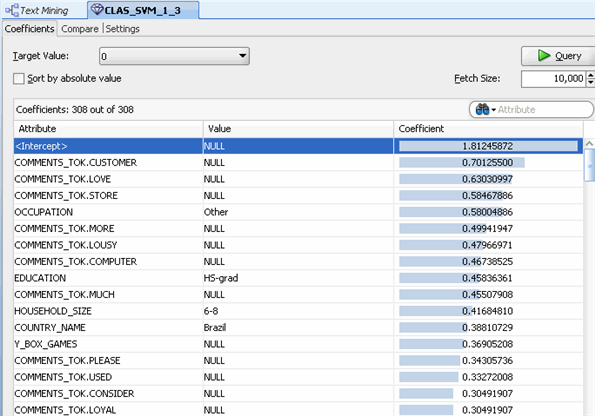
E. When you are done examining the models, close the display tabs for the selected models.
|
After examining the test models, you can apply all of the models to
new data, or you can select a model and apply just that model to new
data.
In either case, the text column in the new data must be prepared in
the same way as the text column was prepared in the data used to build
the models.
Here, you prepare the new data, and then apply all four models to the new data.
Follow these steps:
1
. |
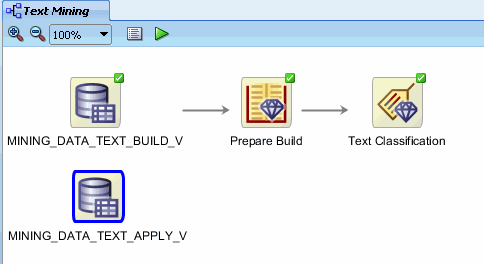
First, add a Data Source node to the workflow for the new "apply" data, just as you did for the "build" data.
A. Using the Workflow Editor of the Component Palette, drag and drop a Data Source node to the workflow window.
Result: As before, a Data Source node appears on the workflow, and the Define Data Source wizard opens.
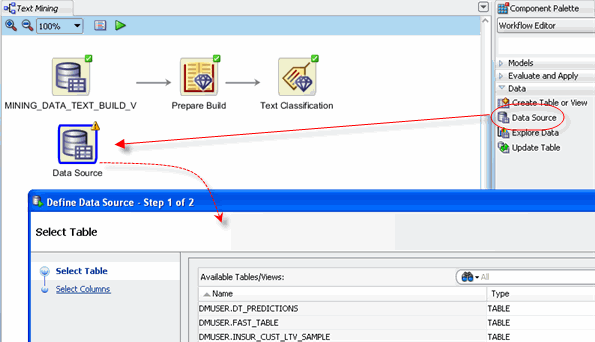
B. In Step 1 of the wizard, select MINING_DATA_TEXT_APPLY_V from the Available Tables/Views list, and then click FINISH.
Result: The MINING_DATA_TEXT-APPLY_V node is added to the workflow.
|
2
. |
Next, create an "Apply Text" node for the new data.
A. Using the Workflow Editor of the Component Palette, drag and drop an Apply Text node from the Text category to the workflow window.
Result: As before, a Data Source node appears on the workflow, and the Define Data Source wizard opens.
B. Using the same technique as described for the "build" data:
- Rename the Apply Text node to Prepare Apply
- Connect MINING_DATA_TEXT_APPLY_V node to the Prepare Apply node
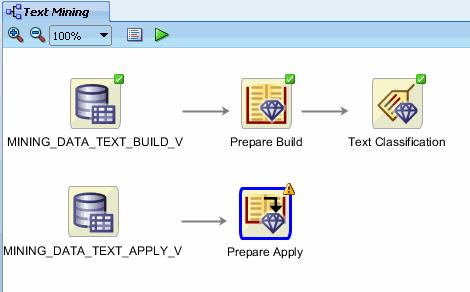
Result: The display should now look like this:
C. In addition, connect the Prepare Build node to the the Prepare Apply node.
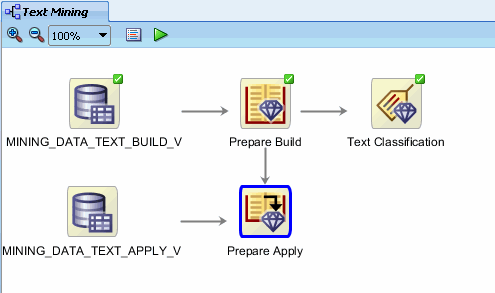
Notes:
- The yellow "!" symbol dissapears from Prepare Apply, indicating that it is complete.
- This connection will enable application of the text
transformation rules that are defined in the Prepare Build node to the
Prepare Apply node.
|
3
. |
Now, right-click Prepare Apply and select Run from the menu.
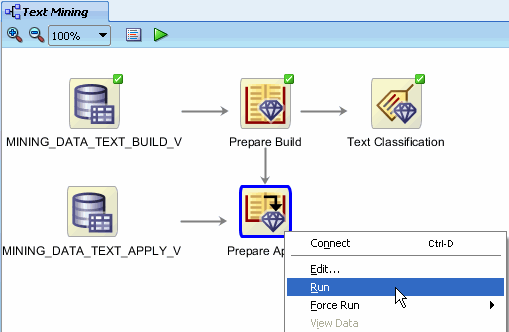
Notes:
- You can monitor this build in the same fashion as before.
- During execution, the Apply Text node (Prepare Apply) uses
the text transformations defined in Prepare Build to process the new
data.
- The transformations are done by automatically matching (by
name) columns of MINING_DATA_TEXT_APPLY_V with the transform columns
generated in the Prepare Build node.
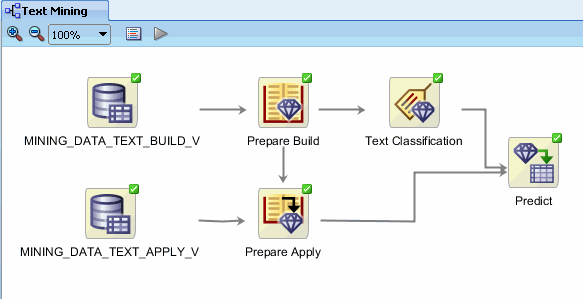
After execution completes, you can apply the models to the prepared new data. The display should now look like this:
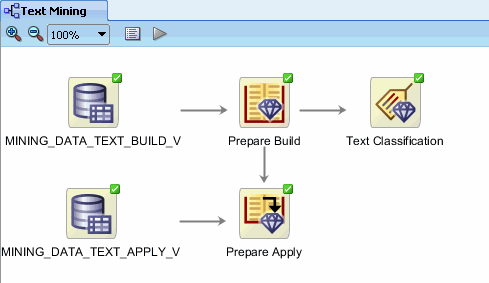
|
4
. |
Add a final node to the workflow.
A. Open the Evaluate and Apply section of the Components Palette, and then drag and drop an Apply node to the workflow, like this:
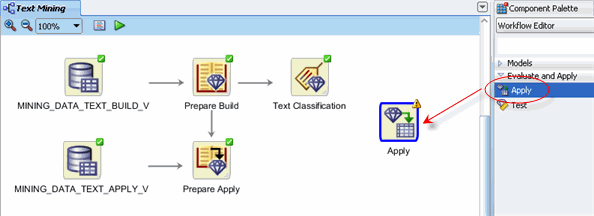
B. Rename the Apply node to Predict.
C. Create two links the Predict node:
- First, connect Text Classification to Predict.
- Second, connect Prepare Apply to Predict.
Result: The display should now look like this:
|
5
. |
Before running the prediction models, you will add the
CUST_ID attribute to the Predict node. This additional data allows you
identify predictions.
A. Right-click Predict and select Edit from the pop-up menu to display the Edit Apply Details window.
B. In the Edit Apply Details window, select the Data Columns tab, and then click the Edit Data Columns (+) tool, as shown here:
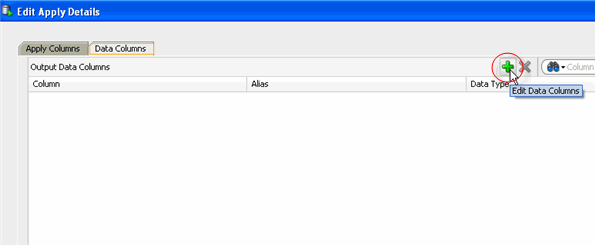
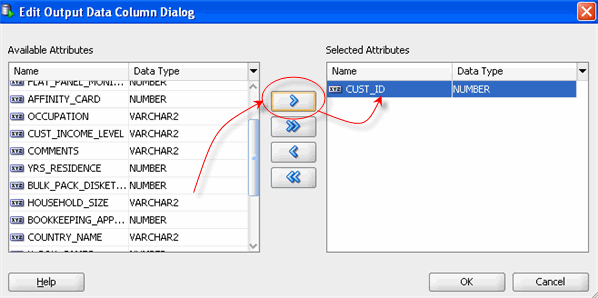
C. In the Edit Output Data Column Dialog, move CUST_ID from the Available Attribute list to the Selected Attribute list, like this:
D. Click OK to close the dialog and return to the Apply Edit Details window.
Results: the Data Columns tab of the Apply Edit window now looks like this:
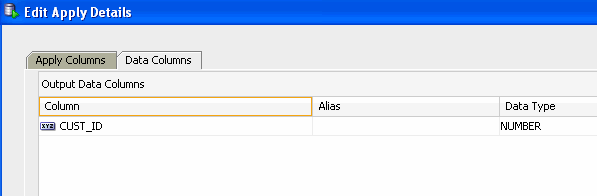
E. Click OK to close the the Apply Edit Details window.
|
6
. |
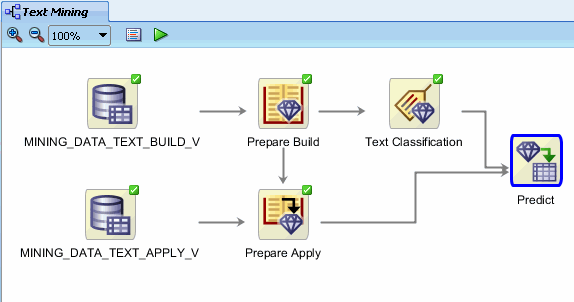
Finally, to apply all four models to the new data, right-click Predict and select Run from the menu.
Monitor the run process as before. When complete, the display should look like this:
|
7
. |
After execution completes, you can examine the predictions of the models.
To view the results, right-click the Predict node and select View Data from the Menu.
Result: A new tab opens with the prediction results for all
four mdels. For each customer (CUST_ID), the predicted outcome and
probability for that outcome is shown for each model.
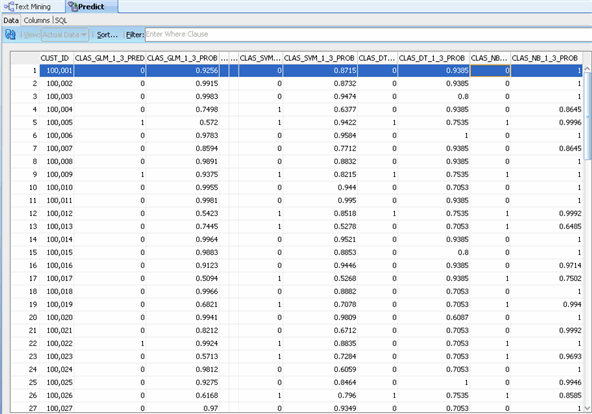
Note: Oracle Data Mining's Naive Bayes model is able to
leverage all of the available structured and unstructured data to build a
predictive model that produces:
- A prediction about each customer's likelihood to be a high-responder to the Affinity Card.
- In this example, by providing a 10% discount, customers are likely to:
- Over respond
- Consolidate purchases to this store
- Buy products for friends and family
- Generate 11% or more in additional revenue
- A probability for each prediction.
- In this example: sorting all customers by likelihood to
be an "1" Affinity Card high-responder, and then by Probability
generates a prioritized list of target customers for our promotion.
|
8
. |
Close the Predict tab, and then close the Text Mining workflow.
|
In this lesson, you examined tasks associated with performing Text
Mining with the Oracle Data Miner graphical user interface, which is
included as an extension to SQL Developer, version 3.0.
In this tutorial, you have learned how to:
- Create a Data Miner project
- Build a Workflow document
- Create data sources from unstructured text data
- Transform unstructured text into a format that can be mined
- Build and apply Classification models for text mining purposes
To learn more about Oracle Data Mining:
Curriculum Developer: Brian Pottle
Technical Contributors: Charlie Berger, Mark Kelly, Margaret Taft, Kathy Taylor


 Click icon to hide all screenshots